Showing posts with label home projects. Show all posts

Saturday, April 16, 2011

Nursery Update - Paint, Crib, and Blinds

So I realize that I have left everyone hanging on the progress of the nursery, which, admittedly, hasn't been a ton.  But we have done some of the foundational work.  The "before" shot of the room was an empty blue box, later transformed with the neutral paint.
That was the process of going from blue, to primed, to painted.  Byron did the whole thing, pretty much because he wouldn't let me come anywhere near the paint.  Even though we did get no VOC paint and it should have been fine, he still did it all.  The strange thing is that whenever other people are doing projects, I get super antsy to join in.  I was nearly beside myself the whole time trying to figure out what to do.  Somehow I managed.
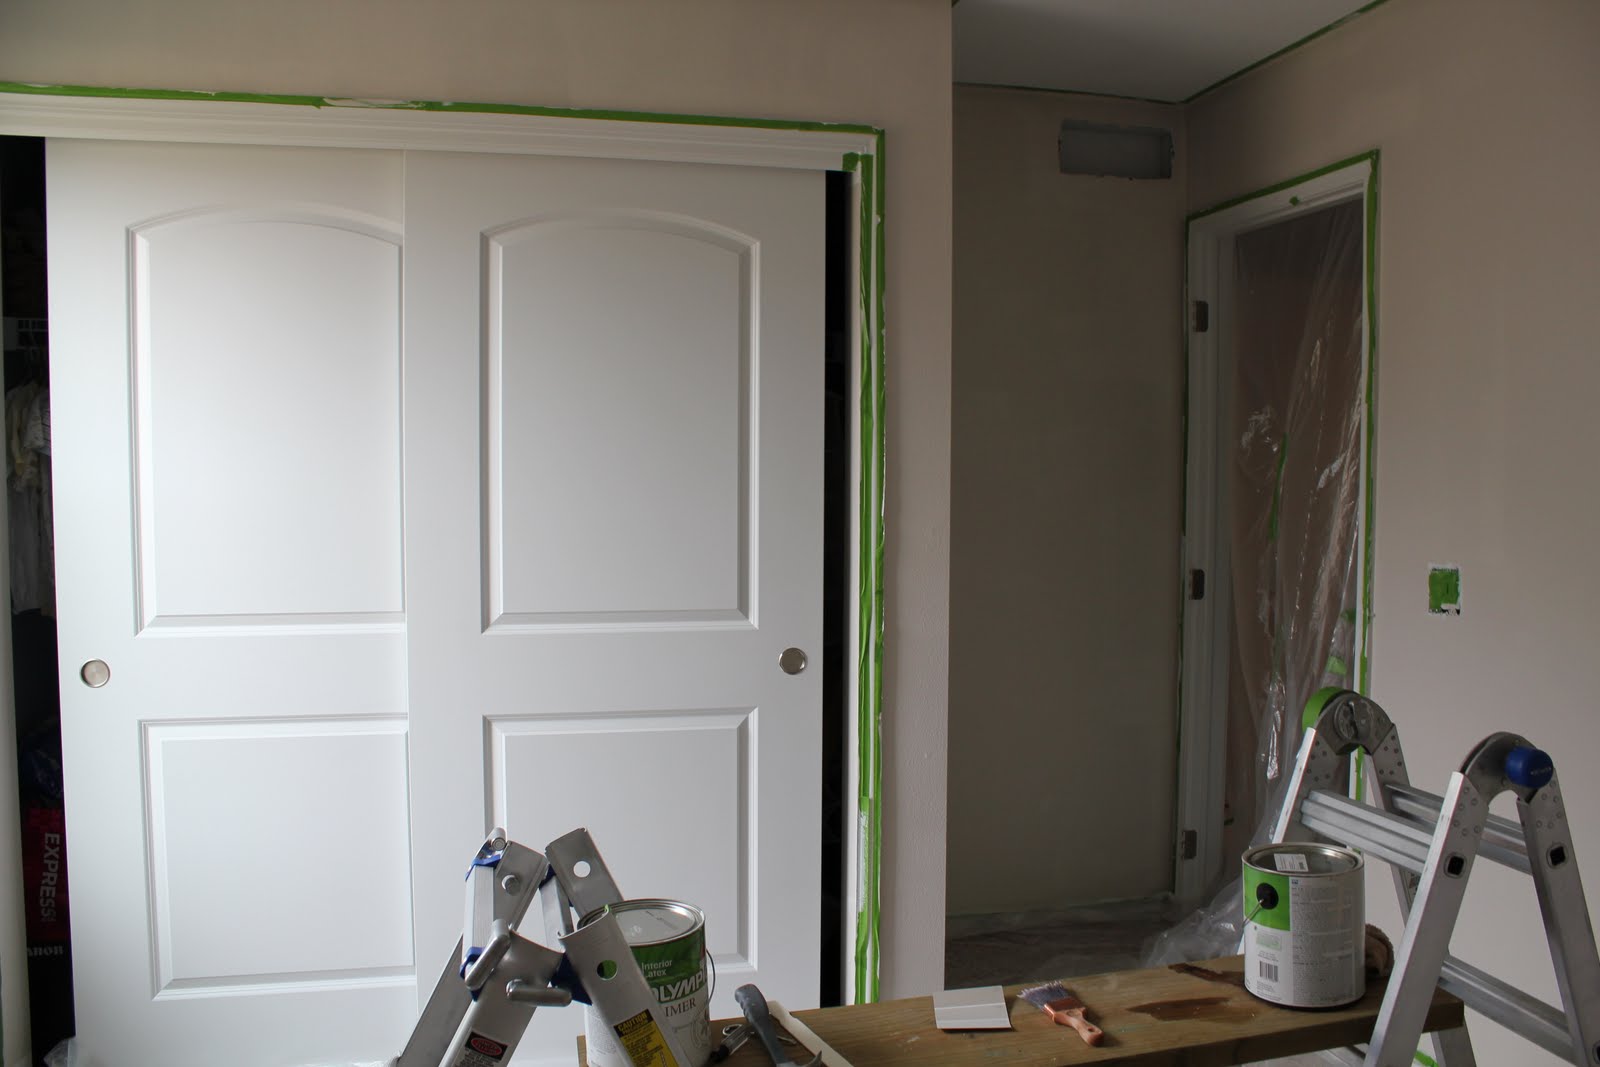
One fun thing I wanted to point out is that we used magnetic primer underneath the window, just for a little something fun (that's what the black stuff was).  Byron was definitely skeptical, and I was a little worried that we wouldn't be able to cover the black with such a light topcoat, but if it didn't work, we were only out the cost.  Fortunately, it works! Byron became a believer, and hopefully it will serve as a fun little treat for our little one.
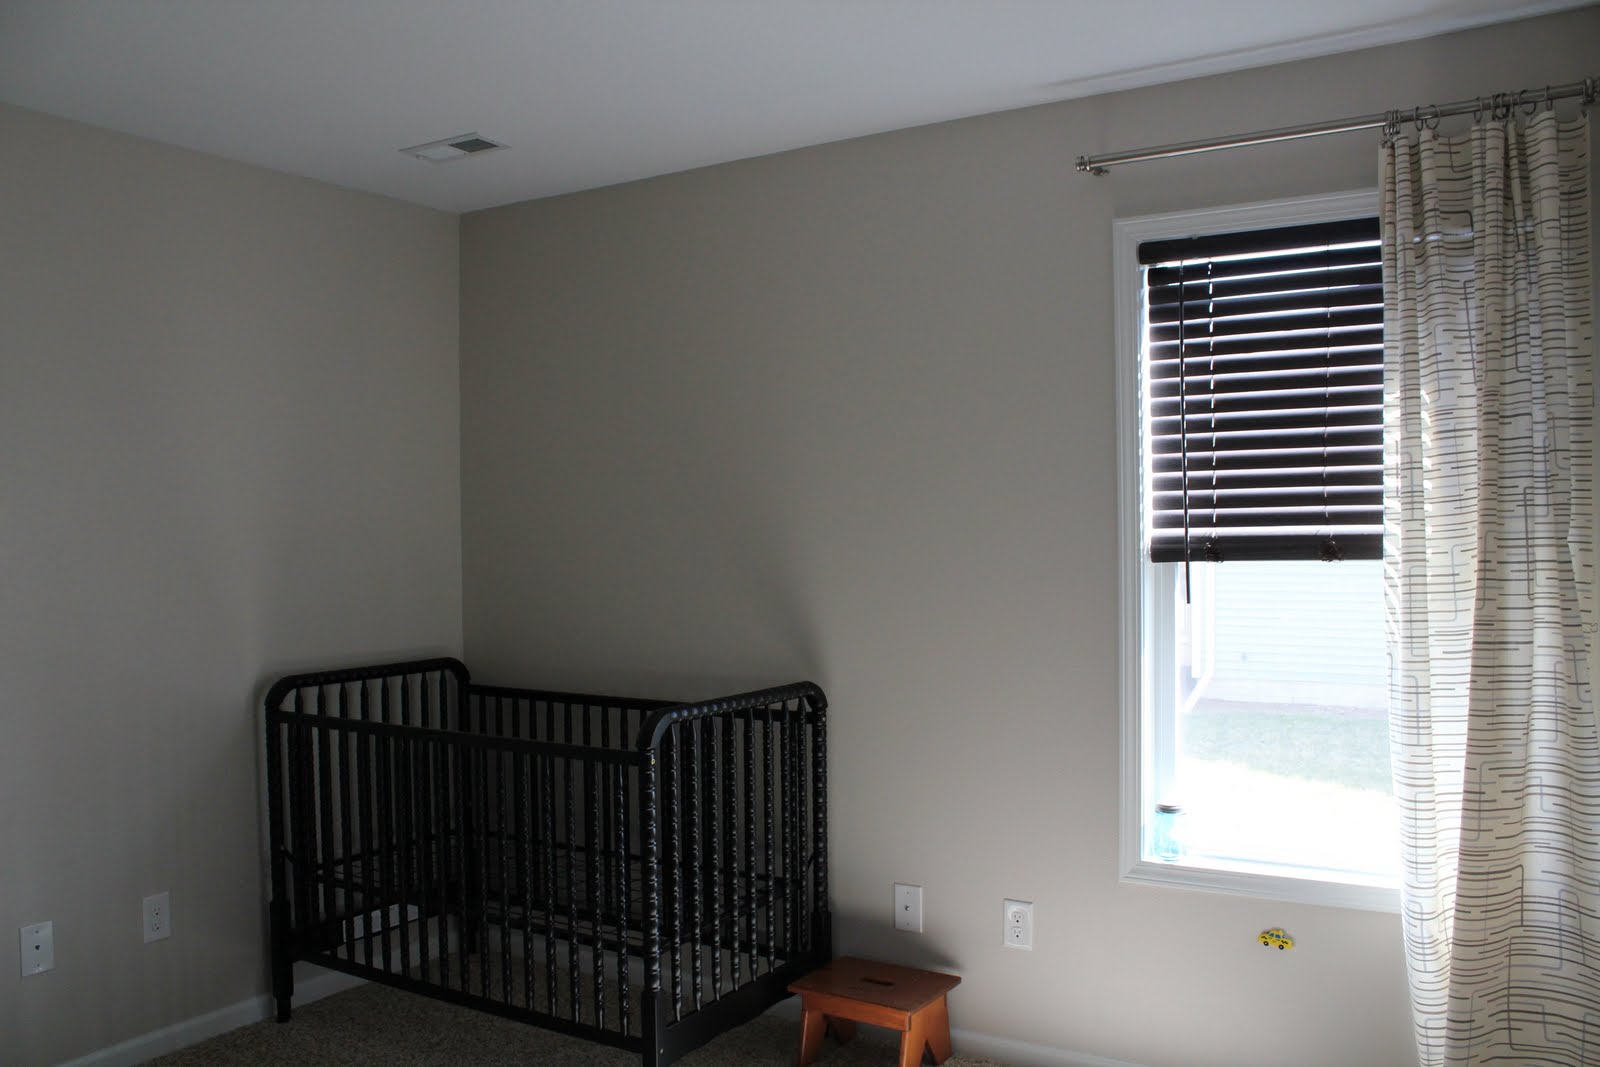
After we removed all the tape and put away all the tools, we ordered this crib.  I had my eye on it for awhile.  I love how old fashioned it looks, and even though it might be a tad girly, I ordered it in a more masculine black.  It came within the week and it is perfect.
Finally, we hung blinds in the room.  I am a curtain girl at heart, but we learned from experience when this was set up as a guest room that there is a certain time in the afternoon where the sun peeks through and you can't hide it with curtains no matter how hard you try.  Well, you can, but it involves taping the curtain to the wall.  Classy, we know.  So blinds were a necessity.  The first two options we tried weren't the right size, but the third time was the charm.  We got these from Target, which only cost about $16.  I wasn't the smartest when we hung them, so we did end up with a few too many holes in the window frame, but fortunately you can't see our mistakes.
And with the paint done, the crib put together, and the blinds installed, the room now looks like this.
The curtain isn't really a curtain - I just clipped one of my inspiration fabrics up to the rod to see if I liked it.  And I do. But, I don't have enough to make two floor length curtains (my favorite).  So I could either do one panel, and always have it open to the side, or I could do two panels, but not have them be floor length.  I think there is enough to make them just longer than the bottom of the sill.  I hope.  Any advice?  I'm all ears.  I do have the other fabric that I could use for curtains, and I think I might have enough of that to make two panels.  So we'll see what I end up with.
The next project for the room will be to install this light fixture, which I just ordered today.  I saw it in a master bath/master closet redo here and I loved it.  It is just what I was looking for locally but wasn't finding anything.  It should hopefully be here next week, but it is something that we might have to lure some friends over to help us (and by us I mean Byron) hard wire it in.  Don't everyone call us at once, now.
We still have to start working on the dresser, and after that, I'm a little at a loss.  I am scouring the ends of the internet for inspiration and ideas, and I know everything will come together eventually.  And if it isn't all in place on day one, I'm pretty confident the little guy won't notice it anyway.

Saturday, March 12, 2011

Homemade Laundry Soap

This past week, I was having a conversation with my mom when she said, "I really hate it when people buy things and then don't use them."
The thought that ran through my head was "Guilty."  I never mean to do this, I just get so many ideas and lack the time or energy for follow through.  So I felt a little convicted, and something popped into my mind that I new I needed to tackle.  A while back, I had made a batch of homemade laundry soap.  It was awesome, and both Byron and I loved it. Once we went through the first batch, some time later I bought more ingredients to make more.  And then they sat on the shelf.  For months.  Until now.
So today, when I woke up bright eyed at 5:45 am (does this happen to anyone else?), I knew it would be a great time to quickly make another batch.  It only took about a half hour it was so easy.   And now, I will share it with you.
I got the recipe from a woman from my hometown.  I don't know where she got it, but as far as I'm concerned, the credit is all hers.  Here are the ingredients:

  • 1 Fels-Naptha bar
  • 1/2 cup Borax
  • 1/2 cup Arm & Hammer Washing Soda
Don't those ingredients make you feel like you walked into the 1950s?  Yeah, I had never heard of some of them.  In fact, I couldn't find the washing soda in my entire city, so I had to resort to the small town my parents live to find it.  Anyway, you start with the Fels-Naptha bar.  The directions say to chop it up into little pieces and then put it in the food processor.  What works for me is to just drag out my cheese grater and go to town.  Ironically, I don't use my cheese grater for cheese that often, but the majority of the time I actually use it for non-food projects.

I guess you can't really see in the bowl, but it basically looks like grated soap.  With a couple pieces of grated skin mixed in there.  No matter how careful I try to be, I always catch a finger somehow.
Once you have that done, you just add the Borax and the washing soda and mix well.
Since I had the Borax and washing soda from a previous batch, it got a little lumpy.  I tried to break up the lumps as much as possible.  If you use fresh, you shouldn't have that problem.  Store the soap in a covered container.  It's really as easy as that.  And the best thing is, it only takes about 2 tablespoons per load, so even though it doesn't look like much, it lasts quite awhile.  I do still have enough ingredients on hand to make two more loads, so I still have a little bit of that guilty conscience (thanks mom), but I feel better that I have one less project hanging over my head...until my next great idea strikes!

Thursday, October 28, 2010

Adding Number 30

I got it.  Forcing paper whites.  That's my number 30.  I have always wanted to do it, and I always get the urge when decorating for the holidays, but if I add it to my list, I guess I'll have to follow through now.
photo found here

Sunday, September 19, 2010

Honey-Do List

As I am sure many married couples can relate to, especially ones that have either been together for a long time or else are low key like us, dates come in all forms.  Recently, we decided to go out on a date.  To Lowe's.  At 1:00 PM on a Sunday afternoon.  No, it's not the most romantic day, time, place, or concept, but it worked for us.  What was our mission?  Nothing really.  We just strolled around the store and talked about projects that we want to do around the house.  And since I had my camera in my purse like I usually do, we decided to document it.  And now, for you're reading pleasure, I present to you my "Honey-Do List."
***NOTE***  I just want to say that I consider BOTH Byron and myself to equally represent "Honey".
1.  Tiled Backsplash
I would LOVE a tile backsplash in our kitchen.  I hate our current mini-backsplash.  To me, it is just a joke and had I realized that our builders were going to do that I would have specifically asked them not to.  I learned my lesson too late.  I would much rather have a full backsplash in something like this.
I believe the upper left is some form of marble, the upper right and lower left are some type of stone, and the lower right is again some type of marble, but I can't confirm that.  I have been watching a LOT of Sarah's House on HGTV.  Sarah loves marble.  I love Sarah.  Therefore, I must love marble, too, although if I did go with marble, I think I'm leaning toward the more traditional (on the upper left) than the version with the black (lower right).  Our cabinets are white and the granite is lighter, but still multi-colored.  Would adding a marble backsplash leave the kitchen too white?  Well, the one thing I learned from this trip is that I definitely favor the brick pattern.
2.  Organized Bathroom Cupboards
I think I've already admitted how messy I am, especially in the bathroom.  I have basically overtaken what little counter space we have, and unfortunately I am too embarrassed about it to show any pictures at this time.  But wouldn't it be amazing if I could have one of these?  Or even two?
At $84.97, this is no cheap storage solution.  And I'm a cheapskate spread out the expenses type of girl, so I'm thinking this will get put on my after Christmas to do list.  My side of the bathroom will be the first recipient, but I would like to get one for Byron's side eventually too.  That way, I can have the two shelves on my side, the entire middle cabinet, and one shelf on his side, and he can have one shelf, too.  Haha.  It's not that bad, really, I just don't wake up looking as naturally beautiful as he does.
3.  Fancy Door Hardware
I have no reasoning for this.  I'm just drawn to it.  I would also like to paint the front door a bright, poppy color (I'm leaning toward a muted pumpkin, which would make the brick pop).  Right now the front door is a taupey-brown color.
4.  Double Decker Closet Storage
We have a big closet.  It is big enough to hold all of our clothes, especially because we are pretty simple people and don't go clothes crazy, plus we I have a dresser in the bedroom.  But what the house lacks is good storage throughout.  If we built our closet shelving up, we would have additional space to store the type of items that we don't have to access frequently, yet we don't want to store all the way in the basement.  Extra linens from our overflowing linen closet or some of our off season coats and jackets are just the type of things I have in mind.
You may have noticed that I just showed you a picture of garage shelving.  Yes, we need that too, and yes, it is just a little different that what I would choose for the closet, but you get the idea, right?
5.  Bedroom Sitting Area
We have a nearly empty wall in our bedroom.
It would be the perfect place to recreate something like this.
Image found here.
We already have a chair that we like.  Look what they have at Lowe's.  I don't know if you can see it from the picture, but it is a really great price for a mirror that big.
6.  Layered Window Treatments
I really love the look of bamboo blinds + curtains.  I have seen them many places scattered throughout the web.  I almost have all the windows curtained (enough already, I know), so the next step would just be to add the bamboo.  If we did that, would we then be bamboozled?  Groan.
That's it, for now.  We had a great time, even if it wasn't our most romantic date.  And we didn't leave empty handed, either.  Byron decided we could get a treat!
In case you didn't remember, it was white (and bent) before.  With every change, even the little ones, I love my house more and more.

Saturday, August 21, 2010

Curtains in Person

I couldn't think of a better title for this post.  Sorry guys.  Creativity is running a little low right now.
As I promised, I finally took a picture of the curtains that I hung in our bedroom.
I think this is the best snapshot I got that shows the room in perspective.  This is the view you would see as you walk into the room from the hallway.  Forgive the pillow that I shoved under the bed.  I didn't think it would be seen.  Oops.  Now it just looks like a pile of dirty clothes.  It's an extra pillow people.  I'm really trying to keep things clean around here.
Here is the pattern close up.  I never got around to ironing them so I picked the least wrinkled spot to zoom in on.
Overall I am really happy with them.  I like them open better, because then they are more "gathery".  All of our windows are apparently wide, and when the curtains are closed they almost look like they are the wrong size.  I am hoping someday to add bamboo blinds to all of the windows throughout the house, and so once I do that (give me like 5 years or so) maybe I will just keep the curtains open all the time.
But...did you notice anything else new in the first picture?  We finally hung our wedding picture!
I've had this picture since Christmas.  Because we were in the middle of building our house, we never hung it at the old place.  Then, when we were trying to find a place for it in the new house, I was inspired by this idea and wanted to make one of my own for either side.  I would hang the three pieces in matching frames in the living room.  Then that DIY project bombed...majorly.  So this little guy was left without a home for another couple of months.  Finally, we found it a home in the bedroom and I am really happy with where we have put it.  And honestly, I think everyone else will be happy with it as well, as it is a way to keep one of our lovey-dovey personal memories in the bedroom, instead of forcing everyone who comes to the house to stare at us.  I don't think I ever convinced myself that it was okay to put wedding pictures, especially wedding pictures of this scale (it is 16x20), in the most public area of the house.  Regardless, it's up, and that's one more step in the right direction of making our house into our home.

Wednesday, July 7, 2010

Cheap Fix

Although we built our new house from scratch and I was able to hand pick just about everything, there were still several things that ended up being a surprise to me.  For example, in the bathroom, FORTUNATELY our builder was so generous to give us a towel bar.  UNFORTUNATELY, it only holds one towel.  Proof.
Please notice my awesome photoshopping skills.
I am great at distorting images and matching color.  Maybe.
Notice the one towel that fits on this towel bar.  You will just have to trust me that there isn't enough room for two, because my awesome photoshopping skills might not make that clear.  This doesn't work so much for me.  First, I share this bathroom with my husband.  Second, I have long hair.  Long hair = two towels needed for showering.  Follow me if you will, but Byron + me + me = three towels.  So for the past four months, many a towel has found itself on the floor (ack!).
That's where my husband came to the rescue.  On our rainy day off yesterday, I dragged him into TJ Maxx where we picked up some lovely hooks that will hold, get this, four towels!  Woo hoo!  And at only $9.99 each (we picked up two - one for the spare bathroom as well), it was such a cheap fix.  15 minutes later, voila!
Hooks!  I plan to take down the original rinky-dink towel bar and instead replace it with artwork of some sort.  The only thing I have on hand that would fit in the space is a ballerina photograph.  The bathroom is not really the place for a ballerina, but I guess we'll see.  Maybe it would be a good chance for me to try my hand at painting!?!?

Saturday, July 3, 2010

Popping In the Cork

A few weeks ago, the night before we left to go to Florida to be exact, I got some ants in my pants.  I had to do a project, and I had to do it right then.  I had just read this post and I knew that it was probably written specifically for me.  Since we had moved in four months ago, I had not really revisited my kitchen cabinets, where in a hurry to get settled, everything was pretty much just thrown in wherever a space could be found.
I was dealing with a limited amount of time before I was to be gone for a week, so it would be safe to say here that the kitchen cabinets still have not been organized.  But the one thing I did do before I left was to install cork board on the inside of my kitchen cabinet doors.  This is such a genius idea - I don't know why I didn't think of this myself.
So off we went to Target, and picked up a package of these:
They even came with their own adhesive, which was basically just double sided tape and really easy to use.  My kitchen cabinets have a ridge on both the inside and outside, so I just measured the inside of the ridge, cut the cork to size, and really just popped it into place!  I went from this
to this
in abut 10-15 minutes.  I have also taken much of the junk that manages to clutter the side of my refrigerator like coupons, reminders, and recipes, and conceal them out of sight.  The good thing is they are still within easy reach.  The side of my refrigerator definitely thanks me.
***NOTE***
Please ignore the clutter inside the cabinet.  Like I said, that part is still on my to do list!

Monday, April 5, 2010

Little by Little

Little by little things are taking shape around this place.  Things are actually taking shape around here more quickly than I'm posting, because I'm still trying to get down that whole process of, you know, taking pictures of what I'm doing (before and after), uploading those pictures into the computer, finding them again, writing up a post, etc.  It's a complicated process for some of us.

So anyway, today a couple of things have been done.  The first is that I found a place for one of my posters, and we got it hung.  I actually took the initiative myself for once and measured the spot for the nail.  My big strong husband came along and actually pounded it in, but mostly because it was over my head, not because I'm not capable, right?  Right.  Anyway, it took one of our bedroom walls from looking like this...


To this...


The second thing we did tonight was bring in the TV stand that my husband so lovingly made for me.  I don't want to get into it, but what was supposed to be a simple project turned into a loooong project, version 3.0.  It may or may not be finished tonight, but we are using it as is in the meantime.  I'm sure there will be pictures of it  at another time.  That is, if I get that whole picture taking process down.

So slowly but surely, we are putting our mark on this place.  It is going from a bland, new construction ranch, to the place where WE call home.  And despite my frequency (or infrequency) of posting, I do have a lot of ideas cooked up inside my little brain just waiting to make their way onto my walls and floors!

Tuesday, March 16, 2010

We're In

We're in our new house, and it feels great to be home.  Despite the lightning speed moving performed by my husband, we still have a lot to do.  The house is like a giant blank canvas, and since I am the queen of indecision, it will probably be a long, ongoing process for me to decorate and perfect it.  But I am proud to announce that we have completed our first before and after.  Okay second...we really needed those bedroom curtains but I don't have any pictures...they can come.  So this is the first before and after with pictures.  You like?