I awoke early (starving) to register for the conference. By 8:00 am I had registered and got my conference materials, handy backpack, and geektag nametag, and I was ready. One problem, there was no food to be seen. So before I hit my first session, I went to the Garden Grove for some breakfast. Bonus for me, it was a weekend morning, and the characters were out and about, greeting all of the restaurant patrons. Check us out! I even asked Pluto what he thought of my conference agenda. I think he was probably overwhelmed.
Sunday, June 13, 2010
Saturday, June 12, 2010
A Baby Quilt in Three Parts, part 3
Here it is, the final hurrah! This is how I finished my baby quilt and sent it off to the lucky recipient. And by that I mean, will send it off to the lucky recipient almost 2 months late. I hope it's the thought that counts.
I started by making the quilt binding - lots and lots of quilt binding. I knew I wanted the binding to be a little thicker, so I cut a bunch of 3-4 inch bias strips. I figured this measurement using a really fancy technique called "using the width of your ruler".
I sewed these strips into one really really long strip. In the end, I had probably 16 feet of bias tape. I don't actually know how long it was but it was a lot - I estimated high. Once I had this strip ready to go, I ironed it into submission. In case you have never done this before, you basically fold the outside edges into the center and iron, then fold those folded edges into the center again and iron. Somewhere along the way, I learned a trick in doing this. When creating the first crease, you off set where "center" really is. One side will end up being slightly longer than the other, which will come in handy later. The best help I can give you comes deep within this tutorial, see step 4.
Yes, that is a lot of bias tape, but in actuality, it really was pretty close to the right amount. I only had enough left over to tie around the quilt for packaging and also to torture my dog. Speaking of my tortured dog, here she is. She secretly LOVES this look!
But anyway, now that I had the bias tape all ready to go, it was time to sew it on. To be honest, this is by far the best and easiest explanation of how to sew on bias tape, so please go check it out (and commit it to your memory...or bookmark the location. Unless you have amazing powers of memory, you will need to refer back). Basically, though, you line up the longer end of the bias tape with the back of the quilt, and you sew in the fold so that your seam can't be seen. Be careful around the corners - I just googled how to do this so that I didn't mess it up completely. I made it through - you can too. To sew the front, you fold the bias tape over and topstitch the whole thing down. Because your top edge of the bias tape is just ever so slightly shorter then the bottom, as long as you are careful, you will automatically catch the bottom portion even though you can't see it.
Here is the picture where I have pinned it on, before I started sewing the second side. I like to use pins. They help make up for my mediocre sewing. Anyway, that's pretty much that. It was an easy process that really only took a few hours altogether, I just had to chunk them out to work around my time schedule. And of course the remaining 6ish weeks that it took me to write about it and, uh, send it off. I'll leave you with pictures of the finished project.
Friday, June 11, 2010
We Up and Went to Florida
We just spent the last week in Florida - me attending a conference for work and Byron to work on his tan. It was such a great week. Sparing you the conference details (I do work in IT after all), here are just a few moments we captured.
This is us in front of our hotel, the Walt Disney World Dolphin. Even though it's called the Dolphin, there are fish statues everywhere. Hey Disney, those fish aren't actually fooling us! Notice the especially white legs in this picture. This is a picture from the beginning of our trip.
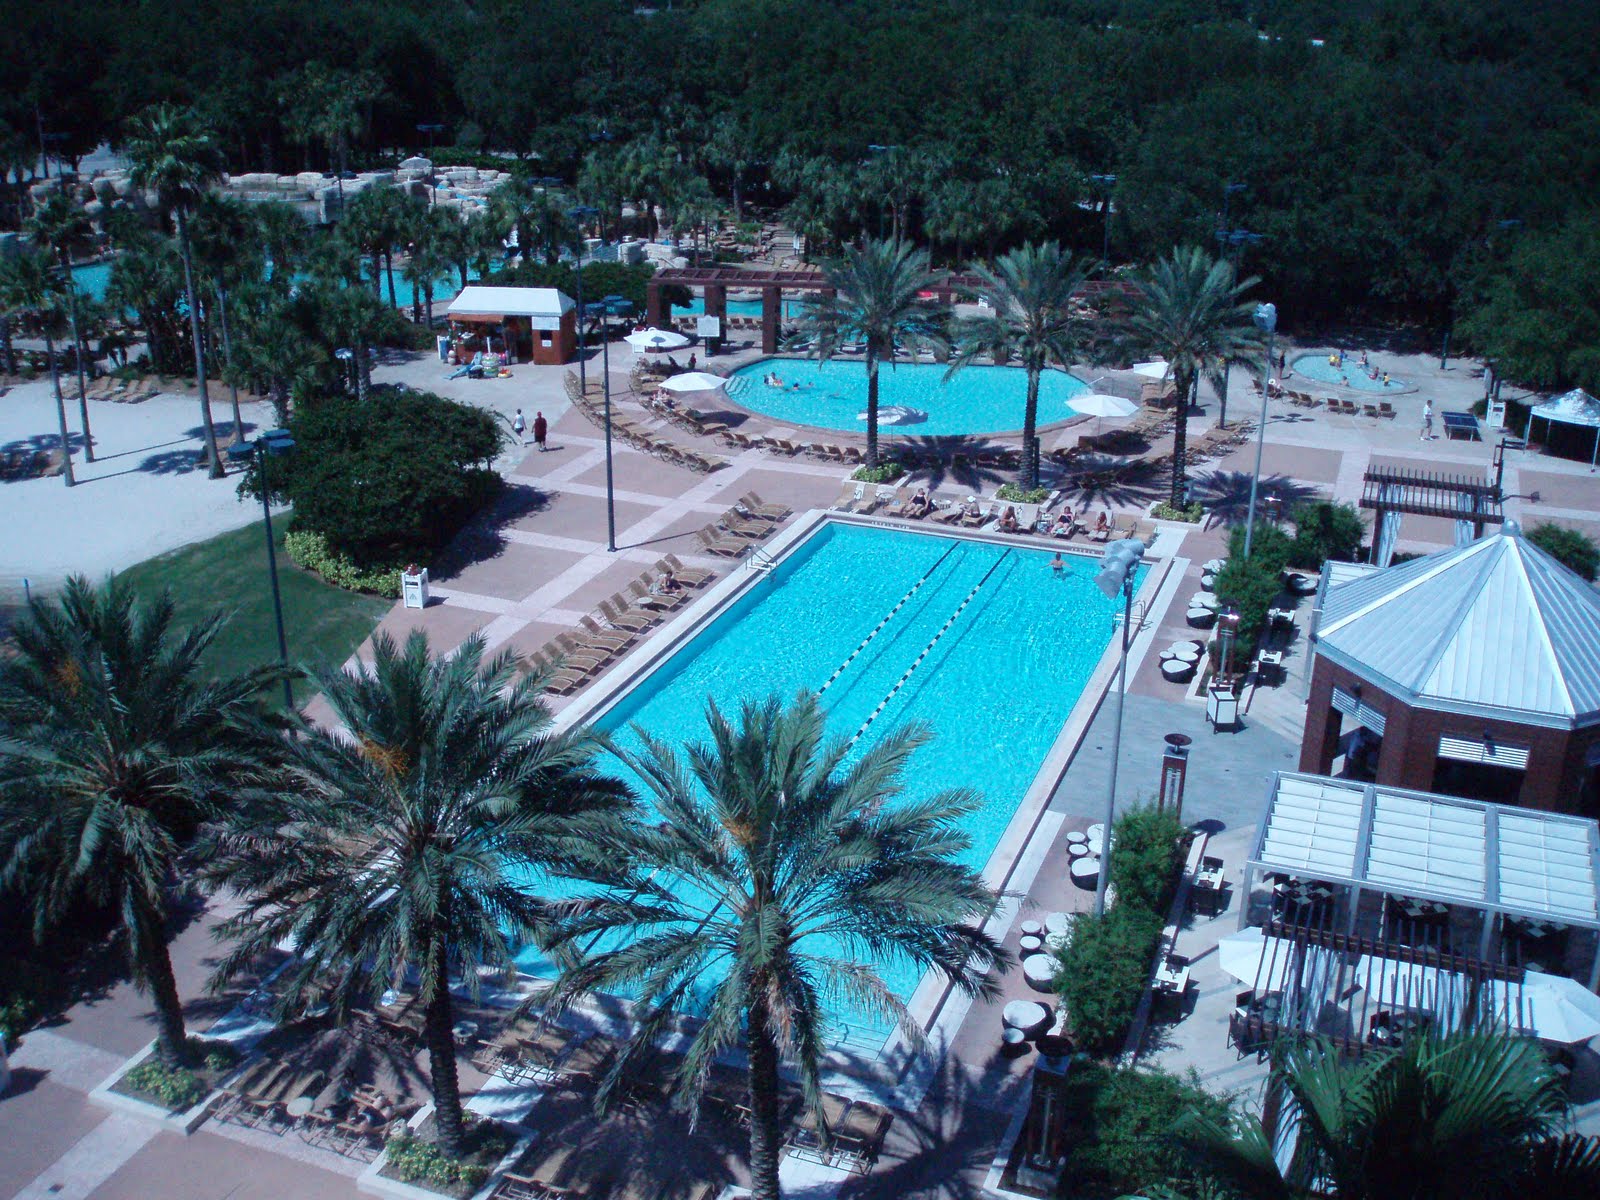
This is the view from our hotel room. Here you can see four out of five pools. We spent the majority of our time in the far pool in this picture. It was really long and ranged between 3-5 feet deep. In the center, there was a waterfall and a grotto. Very cool. Very relaxing. I think Byron had a permanent spot out there while I was attending the conference.
Finally, this is another view from our hotel room. The big building on the left is actually the Tower of Terror at Disney's Hollywood Studios. Later in the week I got the opportunity to ride that...twice. It was awesome and I could have ridden it 20 more times and screamed just as loud each time. The big blue magician's hat in the center is where the fireworks show is launched from. You can't really see anything else of note in this picture.
I hope to post more about our trip soon, and also finish up my experience in quilt binding for those of you so anxiously awaiting that! (I know you are out there...mom!)
Wednesday, May 26, 2010
A Baby Quilt in Three Parts, part 2
I'm having a hard time sitting down to write the next piece of my quilt story. So when is a better time than when I have stacks and stacks of work to do in front of me that I am avoiding? Yeah, that's what I thought. Now'll do.
So if you can remember where we were last, I had just finished the quilt top and now it was time to start quilting. Ummm...any ideas? I kind of had an idea of what I wanted to do based on a tutorial I found here and a quilt here. Then I dove in. I made a quilt sandwich, first laying the backing fabric down on my dining room table, then the quilt batting, then the quilt top.
I started with a handful of safety pins in the center of the quilt, and I just started pinning. I pinned in a swirling pattern and smoothed, smoothed, smoothed as I went. Here it is with just a few pins...
And now here it is with just a few more...
A note to anyone who wants to follow my process. Although I pinned from the center out, I quilted from one side to the other. I found that there were several times when I had a little bit of excess "pouf" going on. To correct this, I just re-smoothed and re-pinned. If I were doing this again, I might consider pinning from one side to the next as well, and honestly, maybe even pin as I quilt. But enough about pinning.
Next I had to figure out a way to quilt a baby quilt in my little old machine. I knew that I wanted this quilted with random horizontal and vertical lines, and some of them in groups of two or three. That's not a terribly hard pattern and I felt like I had a pretty good vision of what I wanted. The first couple of rows were easy-peasy.
The middle section was a little bit trickier. Enter MacGuyver.
I don't know if clothespins are an official sewing notion, but they worked for me. I just rolled up the quilt as I went, and for sewing, I just lined up my presser foot with one of my seams so that my sewing lines were straight. I must have gotten tired at this point and I didn't get any more pictures, but there was one other sewing notion that I used. It was blue painter's tape. There were some places that I wanted to quilt that weren't close enough to a seam, so I used the painter's tape (ball-eying it again) and created my own reference point. It worked really well.
That was really my first experience quilting, well, anything, and I'm happy with my results. The only thing I had left to do was to bind the quilt, which I will share soon in part 3.
Sunday, May 23, 2010
Do You Like the French Horn?
If someone would have asked me this at any time in grades 5 through 12, my answer would have most certainly been no. My parents and my former band teachers can back me up there. But just the other day, I found this little guy in my jewelry box. And I asked myself the question again. I said yes. What do you think?
Saturday, May 22, 2010
A Baby Quilt in Three Parts, part 1
Each time one of my grandmothers passed away, I was the lucky one to inherit their craft supplies. I love that I shared my hobbies with them. I now find myself in the predicament of having more fabric and yarn that I might ever know what to do with. Well, one of my cousins just had her second baby this month, and since baby Michael is the first great-grandchild since my grandma passed away, I thought I would make him a quilt with some of the fabric that I inherited from my grandmother. To me, it seemed like a way to share a piece of my grandmother with my cousin and her new baby, and I hoped it would mean a lot to her. There was just one problem. You see, other than having my mom help me assemble a quilt top when I was much younger, I haven't actually ever made a quilt. So what did I do? Eh, I just winged it. (Ball-eyed it for those of you who know what that means.) To quote a great movie, "What, like it's hard?" I was about to find out.
The first thing that I did, though, was choose my color palette. That was the fun part. I found a lot of blue quilting cotton in my grandma's stash, and after weeding out all of the flowery options, I was left with about 5 good sized pieces. I added an aqua remnant left over from a project I did with a friend and a cream piece that I had laying around. And just to give it some extra punch, I added a green snake-skin print. We just won't tell anyone that in a former life, that piece was meant to be a skirt. Anyway, with the fabrics chosen, it was time to proceed.
When my mind enters in to the creative process, it tends to fall back on its math skills. I basically just outlined a rough grid in my head. I would sew patches into rows, and then sew the rows together to make the quilt top. I measured enough to try to keep my quilt square, but once I got going, I just went with my gut. Here is the quilt taking shape.
So far, so good. I just love how the colors turned out. I surprised myself at how much I like this color scheme, and it was at this point that I thought maybe I should just keep this for myself. Nobody would ever know the difference. But that is not why I started this project, so I decided not to do this. I do have to admit that another thought ran through my mind, and that was that it might just be possible for me to have a son. If any of you tell my husband I will deny it up and down though. [Please don't read this as anything negative towards boys or parents of boys or people who want to have boys. I just have always wanted girls, that's all.]
Stay tuned for parts two and three of this project. There is a good ending.
Can we just look at the color combination one more time?
The first thing that I did, though, was choose my color palette. That was the fun part. I found a lot of blue quilting cotton in my grandma's stash, and after weeding out all of the flowery options, I was left with about 5 good sized pieces. I added an aqua remnant left over from a project I did with a friend and a cream piece that I had laying around. And just to give it some extra punch, I added a green snake-skin print. We just won't tell anyone that in a former life, that piece was meant to be a skirt. Anyway, with the fabrics chosen, it was time to proceed.
When my mind enters in to the creative process, it tends to fall back on its math skills. I basically just outlined a rough grid in my head. I would sew patches into rows, and then sew the rows together to make the quilt top. I measured enough to try to keep my quilt square, but once I got going, I just went with my gut. Here is the quilt taking shape.
Stay tuned for parts two and three of this project. There is a good ending.
Can we just look at the color combination one more time?
ahhhhh...
Saturday, May 1, 2010
Subscribe to:
Posts (Atom)